

I’ve been having trouble lately with Adobe ColdFusion 9, in particular an ODBC connection to an Oracle 10g database. The ColdFusion ODBC Server (the swsoc.exe process) is hanging under load, not only failing to return some queries, but permanently hanging one of its threads. Once they are all hung, the service doesn’t respond at all, and ColdFusion hangs as well.
Temporary solution (until I rewrite the app to use SQL Server) is to restart the ODBC Server service. I’ve been doing that manually when my monitor informs me the site is not responding, maybe 3-4 times per day. But I want to see how it performs if I proactively restart the service every hour. For that, we require some scripting.
The biggest issue is that Windows’ service start/stop/restart interfaces, whether the traditional “net stop” or the PowerShell “Stop-Service” commands, has a very long timeout for stopping a service (looks to be 60 seconds). In the manual case, if it doesn’t stop right away, I go kill the swsoc.exe process and the service restart continues very quickly. But how to script this?
The trick is to put the restart request in a background job (idea found here), and check on it in the foreground to see if it was successful. After waiting a shorter period (10 seconds), if it is still in the “stopping” state, then we can kill the process outright and let the restart commence. Double check (after 5 more seconds) that the service has started, and if it is stopped (the restart failed), specifically start it again.
Start-Job -ScriptBlock {Restart-Service -Name "ColdFusion 9 ODBC Server" -Force }

#give it 5 seconds to stop
Start-Sleep -Seconds 10

$SERVICESTATE = (Get-Service | where{$_.Name -eq "ColdFusion 9 ODBC Server"}).Status
if( $SERVICESTATE -eq "Stopping" -or $SERVICESTATE -eq "StopPending")
{
    # still stopping so force process stop
    Stop-Process -Name "swsoc" -Force
}

#give it 5 seconds to start before we try it again
Start-Sleep -Seconds 5

$SERVICESTATE = (Get-Service | where{$_.Name -eq "ColdFusion 9 ODBC Server"}).Status
if( $SERVICESTATE -eq "Stopped" )
{
    Start-Service -Name "ColdFusion 9 ODBC Server" -Force
}
Save it as a .ps1 file. Make sure PowerShell allows execution of local scripts (in PowerShell, run “set-executionpolicy remotesigned”).
To schedule this to run, create a new scheduled task:


My Kindle version of the venerable JFB commentary. Better than the other slop on Amazon.
I got a Kindle from my mama and papa for Christmas, and I absolutely love it for reading — and only for reading. Light in my hand, reads with natural light, not the glow of a computer screen, and is purpose-focused on just one thing: reading.
One of the biggest disappointments, however, is that many of the books available from Amazon are absolutely horrendous in their digital formatting. The text often looks like it was OCRed and not corrected. Words are misspelled, missing, or run together. And these issues are horribly worse with the public domain materials, which seem to be, for the most part, sloppy automated repackaging of Internet Archive output. There may or may not be the necessary links to navigate the book (table of contents is a must, and an index is often helpful).
Amazon at least gives this slop out for free, but there are a slew of shady publishers on the store who like to charge for it. All of which gives a very bad experience for a user who actually likes to read, and cares about things like text, format, and setting.
I can’t save the world, but I can contribute better things. So I figured out how to make Kindle eBooks and distribute them in Amazon’s store. I’ve done two books so far: a short one of the Westminster Confession of Faith, with integrated Scripture proofs, and the longer Commentary Critical and Explanatory on the Whole Bible, by Jamieson, Fausset, and Brown.
I think they are two great resources for Kindle, and are pleasant and useful in a properly formatted ebook. If you have a little spare change, I’d be honored for you to buy them from Amazon (99 cents and $3.99, respectively). If you’re hard up for cash, let me know and I’ll send you the book files directly.
Another publisher who cares about such things and seems to have invested significant effort to make usable Christian resources is OSNOVA. Don’t know the guy, but he is a conscientious guy and I think you’ll appreciate his materials.
So a client has an Exchange 2003 server that routinely gums up after BackupExec does its work. This thing has defied all manner of troubleshooting, with regard to antivirus, disk location, server utilization, etc., so the only remaining solution is to restart the information store service every morning. (Yes, I know, we really should figure out what the problem is.)
Instead of making the IT person get up every morning at 7 am to do it, how ’bout a little scripting magic? Windows is no UNIX, but we can try.
First, some useful commands to stop and start a service:
net stop MSExchangeIS /y
net start MSExchangeIS /y
Works peachy if the service is actually responding. When it’s stuck, it doesn’t stop on request. You have to kill store.exe in Task Manager. But how do you script that? With PsTools, silly!
So in between that stop and start request, we add:
pskill store /accepteula
Make sure pskill is somewhere in the path of the user executing the batch file. The /accepteula switch is to prevent it from sticking at the EULA which pops up on first use, and perhaps again? — but since this is automated, you’d never know that it stuck, just that your information store never restarted.
Important here, by the way, is to try to stop the service before you kill it. That way if the thing is responding, we don’t send it the shock of a rough shutdown. Pskill will fail gracefully if the service is already stopped.
Put these bad boys in a batch file and run it after the backup completes. Presto change-o, an information store that is ready for the business day.
A side note: It seems that running Exchange on a Domain Controller is a bad idea. But this is Windows Small Business Server, so that’s exactly what we have. One major problem is that shutting the system down takes a full 30 minutes, because Windows kills Active Directory before Exchange and it sits spinning its wheels not knowing AD will never respond. Possible solution (not tested yet) is to script an Exchange shutdown by group policy before Windows itself starts shutdown. This one is for implementation another day…
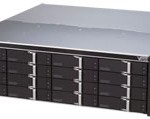
I just installed two Promise VessRAID 1840i units for a client, each one loaded with 8 x 1TB Seagate Enterprise drives. With 8 more drive bays, we can easily take each unit to 24TB without replacing drives, and you can add up to 3 more expansion enclosures, 16 bays each, for a maximum total of 128TB. Impressive, to say the least.
My major issue with purchasing these units is that there is no good review information online for any of the Promise gear. No user forums, either. So you don’t know what you’re getting in to, and have to trust the word of the sales guy (did I mention these things are generally only available through reseller channels?). To perhaps help the next guy, I wanted to provide some feedback on my experiences.
Load
I got my units empty, which I hear they won’t be doing anymore. Came with all the necessary trays and screws to load drives. SATA drives work with no adapters (unlike some Dell arrays), haven’t tried SAS drives. Simple as pie. Biggest trouble was dealing with all the trash: boxes, bubble wrap, and clamshells for the hard drives from CDW.
Power Up
The dual power supplies are rated at 450W each, 900W total, and a max draw of 9A on 100V. So I was worried about overloading my 15A circuit with two of these starting up. From experience, however, the half-loaded unit draws far less. A CyberPower UPS (very nice unit, by the way) shows a peak wattage at startup of 225W, which is only 2A at 110V. Wattage once the fans have gone to normal speed is under 150W. (This is one expensive light bulb!)
UPS Compatibility
The VessRAID has two USB ports on the back to connect the unit to an Uninterruptible Power Supply. (The second one is for an un-defined support mechanism to upload config or debug files via flash drive.) Given that there’s a pretty well-developed UPS standard for using USB HID interfaces, and I figured just about anything new should work. Nope.
The hardware compatibility list provided by Promise lists only two compatible units: APC Smart-UPS 1500, and APC Smart-UPS 3000. My guess is they’re using an antiquated APC protocol. Important note: you cannot use the cheaper SC line from APC, because they only include a serial port, not a USB port, which you get at double the price on the non-SC units. So you probably don’t want to stray from the hardware compatibility list, particularly when buying a UPS.
If, however, you’re creative, you can make something work. If you have a regular server attached to any other UPS, you could use SSH or telnet scripting to login to the VessRAID CLI and initiate a shutdown. I tested it using the Telnet Scripting Tool by Albert Yale (widely available, including at an unauthorized archive of the guy’s software).
Initial Configuration
Initial config, particularly for the network settings, is best done via the serial console port. The units include a RJ-11 to DB-9 cable, but you’ll need a working serial port on your PC or laptop. Given that most laptops don’t have one these days, you might want to invest in a USB to Serial adapter. The Trendnet TU-S9 was cheap and seems to work well.
Management through the web interface must be done on the management port, so configure it in a subnet that you can access from your other machines. NAS and iSCSI will happen through the iSCSI ports. NAS should be on the same network as the clients; you might want to isolate iSCSI traffic in a different subnet (or even a separate physical network).
Configuration (NAS)
All the “i” units of the VessRAID 1000 series (i.e., the 1840i) are mainly intended to be used as iSCSI devices, and have 4 x Gigabit ports for that very purpose. However, they also have a built in Network Attached Storage system that can be used to provide Windows sharing, FTP, and NFS access.
The pros of this arrangement:
The cons of this arrangement:
Configuration (iSCSI)
I originally configured the units in NAS mode, but the client wanted to put some Windows user shares on the array, which require fine-grained folder permissions. So I reconfigured the logical disk for iSCSI use.
The simplest approach is to use Microsoft’s iSCSI Initiator (included in Windows 2008 server, and available to download for Windows 2003 server). There are good instructions available in the VessRAID documentation and from Microsoft on how to get this to work. Especially helpful for best practices is Microsoft’s step-by-step guide.
After connecting the client to the logical disk using iSCSI, you format it in the Windows Disk Management utility. To enable use of partitions larger than 2 TB, you have to convert the disk to use GUID Partition Tables (GPT). Once done, the whole space should be available to format using NTFS. I won’t discuss it here, but make sure to consider the types of files being stored, and other requirements (such as Shadow Copies or NTFS Compression), when choosing an appropriate cluster size.
Benchmarking
I used PassMark’s Performance Test software to obtain some basic benchmark numbers for the VessRAID’s performance. This is using a standard Broadcom Gigabit interface on a Dell Poweredge 1900. All arrays are RAID5.
| Local Array 3 x 160GB Dell PERC 5/i |
Sequential Read | 61.8 MBps |
| Sequential Write | 92.5 MBps | |
| Random R/W | 7.2 MBps |
| WriteThru | WriteBack | ||
| VessRAID 1840i 8 x 1TB Gigabit iSCSI |
Sequential Read | 105.8 MBps | 105.8 MBps |
| Sequential Write | 27.9 MBps | 90.6 MBps | |
| Random R/W | 12.4 MBps | 31.9 MBps |
| ReadyNAS NV+ 4 x 500GB SMB/Gigabit |
Sequential Read | 12.0 MBps |
| Sequential Write | 4.5 MBps | |
| Random R/W | 5.9 MBps |
Note the very significant performance difference between the WriteBack cache setting the WriteThru cache setting on the VessRAID. WriteThru writes the data directly to the disks when it arrives. WriteBack holds data in cache before flushing it to disk, which is far more efficient, as sectors can be written together and larger chunks at a time. To safely do this, however, requires a battery backup for the cache, so that if power is cut suddenly you don’t lose that data (which hasn’t yet been written to disk). The problem is that Promise does NOT include the battery with the units. It’ll cost you an extra $100. You’d figure on larger units like this they wouldn’t nickel-and-dime you, but they do.
Correction: I had reversed the WriteThru and WriteBack terms. I have corrected it in the text above, after the feedback from the commenter below.
The big air conditioner at church wasn’t working right. The second compressor wasn’t turning on, and we couldn’t figure out what it was. Pressing the contactor on the relay powered it right up, so it was wired right. And Loran bypassed the low and high-pressure cutoff safety switches, but it still wouldn’t turn itself on.
So we found the wiring schematics from Carrier. The high power stuff was wired correctly. Problem had to be in the low voltage. So we traced compressor 1’s control wiring from the thermostat connections through the pressure switches, and did the same with compressor 2 (minus the now-disconnected switches). Everything seemed to be correct, except that the incoming low voltage for C2 wasn’t powered.

So we traced a little further, and found a broken jumper in the economizer unit that was constantly calling for outside air, and also thus not energizing the second compressor. My father the soldering gun guru did a little magic on the resistor wire, and C2 powered right up.


Back in the summer of ’95, I had a crazy little summer internship for NAVSSES, the Naval Ship Systems Engineering Station, at the Philadelphia Navy Yard. I worked for the boiler control division, doing electrical diagrams for steam boiler and turbine control systems. And now, 15 years later, it finally pays off. Turns out I can read an electrical diagram.
My sister has been pestering me for ages to design a new website for the Whosoever Gospel Mission. Sadly, my creativity in design ebbs and flows, and it just wasn’t flowing. Until I upgraded all my WordPress installations to the new 3.0 version. I took one look at the new default template (“Twenty Ten”), and thought, “now that’s something I can work with.” 48 hours later… I love WordPress.

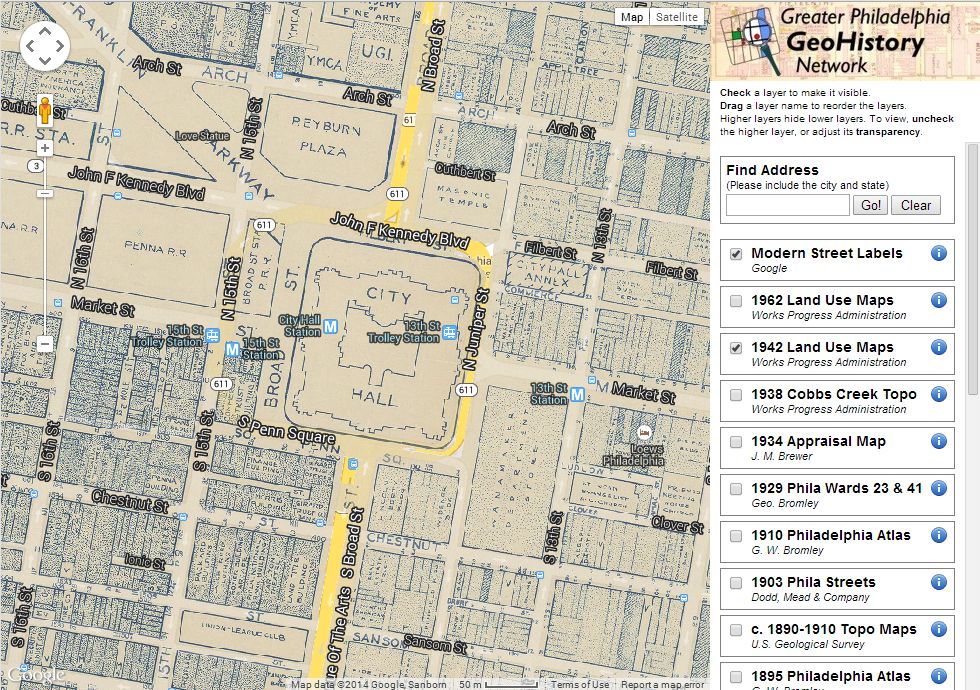
The Google Maps API is really great for building mashups, mixing your own data and maps with Google’s. We’ve been using this on the PhilaGeoHistory.org site, as well as on Philadelphia Architects and Buildings, and it works really well.
One of the things that wasn’t particularly obvious was how to add our own logo next to Google’s logo at the bottom left of the map window. Especially if other sites will be using the maps (like PhilaPlace, for instance), there should be some credit and a link back to the source of the maps. This wasn’t obvious, but it wasn’t hard. Here’s how to do it:
1. Make a nice little logo, probably about 30 pixels high, and not too wide. It should be a PNG file with transparency, so it overlays nicely in the Google Maps interface.
![]()
2. Create a new Javascript file that contains the class for your “custom control,” which is Google’s term for any element that sits on top of the map window but doesn’t move around with the map. In this file (here’s the geohistory.js file), you should have the following:
// SETUP CUSTOM GOOGLE MAPS CONTROL TO DISPLAY GEOHISTORY LOGO

// instantiate the new "class"
function GeoHistoryLogoControl() {}

// inherit the functions from Google's Control class
GeoHistoryLogoControl.prototype = new GControl();

// setup the content of the control
GeoHistoryLogoControl.prototype.initialize = function(map)
{
     var container = document.createElement("div");

     var lnk = document.createElement("a");
     lnk.href = 'http://www.philageohistory.org';
     lnk.title = 'Historic map images provided by the ↵
          Greater Philadelphia GeoHistory Network';
     lnk.target = '_blank';

     var img = document.createElement("img");
     img.src = 'http://www.philageohistory.org/tiles/viewer/ ↵
          images/mapsfromgeohistory.png';

     lnk.appendChild(img);
     container.appendChild(lnk);
     map.getContainer().appendChild(container);

     return container;
}

// set the default location for the control
GeoHistoryLogoControl.prototype.getDefaultPosition = function()
{
     return new GControlPosition(G_ANCHOR_BOTTOM_LEFT, new GSize(75,4));
}
3. In your page that contains the map, load the Javascript file you created above, then add the control to your map.
<script src="js/geohistory.js" type="text/javascript"></script>

<script type="text/javascript">
var map = new GMap2(document.getElementById("map"));
map.enableDoubleClickZoom();
map.enableScrollWheelZoom();

map.addControl(new GLargeMapControl());  // navigation
map.addControl(new GeoHistoryLogoControl());  // logo

map.setCenter(new GLatLng(39.95,-75.2), 13);
</script>
That’s it. Works like a charm.
A little more than a year ago, I wrote about my rather simplistic approach to caching image tiles for the interactive map viewer on PhilaGeoHistory.org. Since that time, I’ve made a few updates that are worthy of a reposting, particularly if you want to use the code for anything.
First, one of our partners, the Free Library of Philadelphia, wanted to use the script, but wanted it in ColfFusion. So I migrated it from PHP to ColdFusion. The two versions work very similarly, so you can see the current version in PHP or ColdFusion.
Second, here are the new features:
Further features that would be useful include recognizing the geographic extent of each layer and not caching tiles outside of that extend; recognizing empty tiles; and more efficiently storing the resulting cached files.
I don’t expect to invest too much in this, especially since there are much larger systems to do things like this (TileCache is one example). Currently, it’s too complicated for me to consider implementing, but if I need more features, or the project scales larger, I’ll have to migrate to something like it.
TIFF files have horizontal and vertical DPI numbers set in the header. You can use a program like IrfanView to see and set the values. Turns out the DPI settings have an impact on how ArcView handles coordinates for geo-referencing. So here’s a little reference.
Beware that when you convert images from one format to another, you might lose the DPI setting. JPEG and ECW files, for instance, may not have any DPI set at all. So when converted to TIFF, ArcView sees no values and uses straight pixels. If you then open that TIFF file in Corel PhotoPaint (or perhaps Photoshop), the DPI is set to a default, like 72 dpi, and saved with the file. Suddenly the points don’t work any more, and if you reload from the saved text file of points, it still won’t work.
One last hint: you can use Excel to open the points (.txt) file and change the X and Y values in the first two columns. If you go from a file with no DPI values to 72 dpi, divide each value (only the first two columns) by 72. Probably can do this in the AUX.XML file too, but you’ll have to write some XSL or do it by hand.